DIY ART JOURNALING
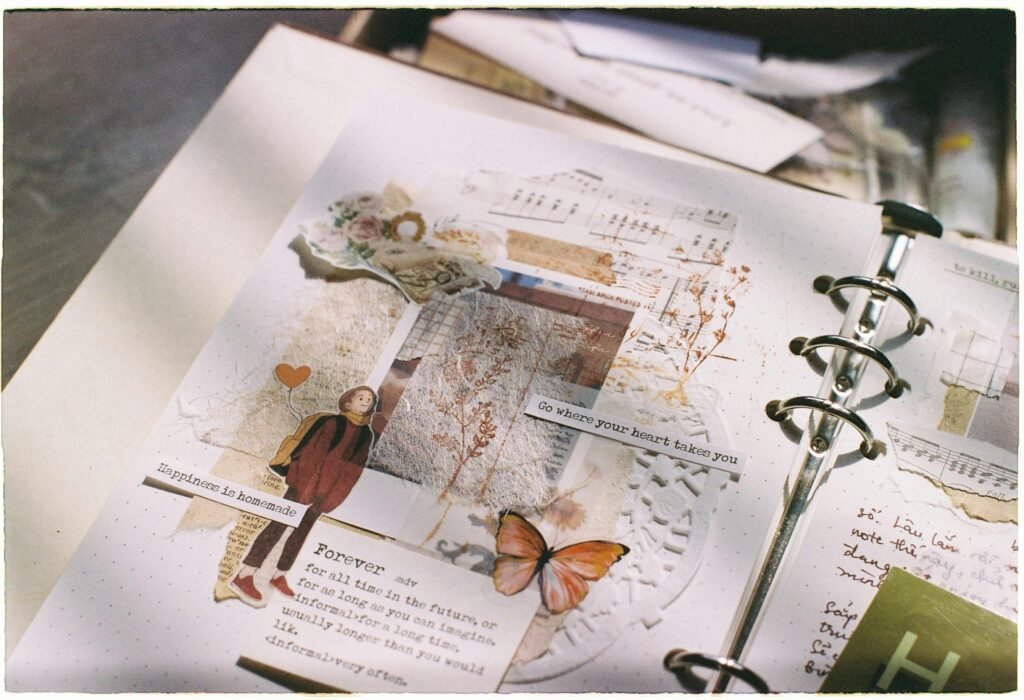
Art journaling is a creative way to express your thoughts, ideas, and feelings through a combination of art and writing. It’s a personal and unique form of self-expression that can be both therapeutic and fun. Whether you’re an experienced artist or a beginner, starting your own art journal is a rewarding endeavor. Here’s a step-by-step guide to help you create your own DIY art journal.
Materials Needed
Before you start, gather these materials:
Journal or Sketchbook: Choose a book with sturdy pages that can handle paint, glue, and other materials.
Journal or Sketchbook: Choose a book with sturdy pages that can handle paint, glue, and other materials.
Pencils and Pens: Use a variety of pens, including gel pens, markers, and fine liners, for different effects.
Paints: Watercolors, acrylics, or gouache can add vibrant color to your pages.
Brushes: A range of brush sizes will help you achieve different painting techniques. Collage Materials: Old magazines, newspapers, and decorative papers for collage work.
Adhesive: Glue sticks, tape, or other adhesives to secure items to your pages.
Getting Started
1. Choose a Theme or Purpose
Decide on a theme or purpose for your art journal. It could be a travel journal, a gratitude journal, or a place to explore your emotions.
2. Create a Cover
Begin by decorating the cover of your journal. This sets the tone and invites you to continue exploring within its pages. Use paint, collage, and other materials to make it uniquely yours.
3. Start with Backgrounds
Prepare a few pages with background layers using paint, paper, or other materials. This can help overcome the intimidation of a blank page and provide a base for your creativity.
Maintaining Your Art Journal
Consistency: Set aside regular time to work on your journal. It could be daily, weekly, or whenever inspiration strikes. Allow yourself to experiment and make mistakes. Art journaling is about exploration and personal expression.
DIY Zen Garden
Creating your own Zen garden is a wonderful way to incorporate a little peace and tranquility into your life. Whether you have a large outdoor space or just a small corner in your home, a Zen garden can provide a serene escape from the hustle and bustle of everyday life.
Materials Needed
To begin your DIY Zen garden project, gather the following materials:
- A container or space: This could be a shallow tray or a designated spot in your yard.
- Sand or gravel: Traditionally, Zen gardens use white sand or small pebbles.
- Rocks or stones: Choose various sizes and shapes for visual interest.
- Rake: A small hand rake or even a fork can be used to create patterns in the sand.
- Plants (optional): Consider using succulents or moss for an added touch of nature.
- Decorative elements: Objects like small statues, crystals, or candles.
Steps to Create Your Zen Garden
1. Choose Your Location
Decide where you want your Zen garden. If you’re creating it indoors, choose a spot that receives natural light and is away from heavy foot traffic. For an outdoor garden, select a quiet, peaceful part of your yard.
2. Prepare the Base
If you’re using a container, fill it with a layer of sand or gravel, about 1–2 inches deep. For an outdoor garden, clear the area of debris and level the ground before adding your sand or gravel layer.
3. Arrange the Rocks
Select a few larger rocks to serve as focal points in your garden. These represent mountains or islands. Arrange them in a way that feels balanced and harmonious, keeping in mind that asymmetry is often used in Zen gardens to mimic the natural world.
4. Add Plants (Optional)
If you choose to include plants, position them thoughtfully around the rocks. Make sure they are low-maintenance and suitable for your garden’s environment, whether indoors or out.
5. Create Patterns
Use your rake to draw patterns in the sand or gravel. These patterns can represent water, wind, or clouds. Try different designs, such as waves, circles, or straight lines, to see which brings you the most peace.
6. Incorporate Decorative Elements
Add small statues, crystals, or candles to personalize your garden. These elements should complement the natural beauty of your Zen space without overwhelming it.
Tips for Maintaining Your Zen Garden
- Regularly rake the sand or gravel to refresh the patterns and maintain the garden’s appearance.
- Keep plants trimmed and healthy if you’ve included them in your garden.
- Rearrange elements periodically to enjoy the creative process and keep the garden dynamic.
DIY Candle Making Guide
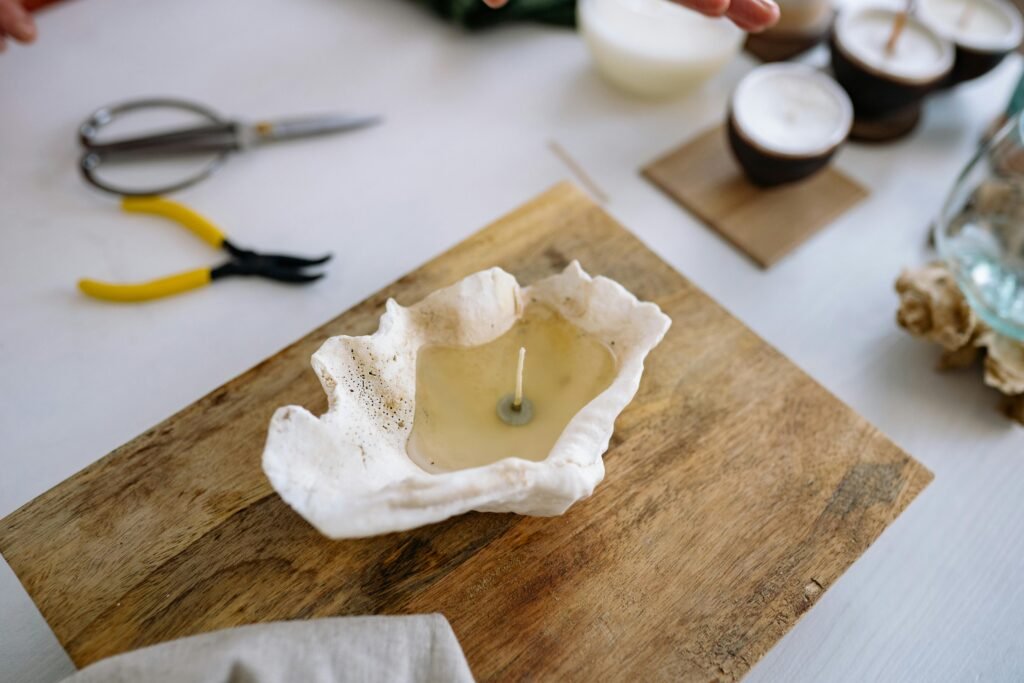
Creating your own candles at home can be a fun, rewarding, and cost-effective way to enjoy custom scents and styles. Whether you’re crafting them for personal use or as thoughtful gifts, this guide will walk you through the essential steps to make beautiful, homemade candles.
Materials Needed
- Wax: Choose from soy, paraffin, beeswax, or palm wax.
- Wicks: Ensure they are suitable for the type of wax and size of your container.
- Containers: Glass jars, tins, or any heat-resistant containers.
- Fragrance Oils: Select your preferred scents.
- Dyes: Optional, for adding color.
- Double Boiler: Or a makeshift one using a heatproof bowl over a pot of simmering water.
- Thermometer: To monitor wax temperature.
- Stirring Utensil: Wooden or heat-resistant spoon.
- Wick Holders: To keep the wick centered during pouring.
Step-by-Step Instructions
1. Prepare the Workspace
- Clean your work area to avoid any unwanted debris in your candles.
- Lay down newspaper or a protective sheet to catch spills or drips.
2. Melt the Wax
- Use a double boiler to gently melt your chosen wax. Avoid direct heat, as it can cause the wax to burn.
- Monitor the temperature with a thermometer. Ideal temperatures vary by wax type but usually range from 120 to 180°F (about 49 to 82°C).
3. Prepare the Containers
- Secure the wick to the bottom of the container using adhesive or a drop of melted wax.
- Use wick holders to ensure the wick remains upright and centered.
4. Add Fragrance and Dye
- Once the wax is melted, remove it from heat and let it cool slightly.
- Add fragrance oil according to the wax’s fragrance load capacity (commonly 6-10% of wax weight).
- Stir in dye if desired, ensuring even distribution.
5. Pour the Wax
- Carefully pour the wax into the prepared containers, leaving about ½ inch at the top.
- Ensure the wick stays centered while the wax cools and solidifies.
6. Cool and Trim
Trim the wick to about ¼ inch before lighting.
Allow the candles to cool completely, which could take several hours.
Safety Tips
- Never leave melting wax unattended to prevent fires or spills.
- Use heat-resistant containers to avoid breakage or melting.
- Ensure proper ventilation when working with fragrance oils and dyes.
Creative Ideas
- Layered Candles: Pour different colors in layers for a striped effect.
- Embedded Objects: Add dried flowers or herbs for a decorative touch.
- Unique Scents: Mix different fragrance oils to create a signature scent.
DIY Diamond Painting: Step-by-Step Guide

What You’ll Need (Materials List)
Canvas: Stiff backing board or foam core (or purchase a blank premium canvas)
Adhesive: Clear contact paper (acts as adhesive canvas layer)
Drills (aka diamonds): Flat-backed resin diamonds (round or square shape)
Diamond painting pen (or stylus)
Wax pad (for the pen)
Tray or organizer (to sort your drills by color code)
Custom design grid or downloadable chart (or printed licensed artwork in pixel format)
Tweezers (optional for precision placement)
Gloss glaze or Mod Podge (to seal finished piece)
Step 1: Choose Your Design or Artwork
- Use a photo, drawing, or licensed image (public domain or purchased).
- Resize your image to a pixel grid — one pixel = one drill.
- Optional: Use software like Photoshop or online converters to map your image to a color-coded chart.
Step 2: Prepare Your Canvas Base
Cut a mat board or foam sheet to the desired size.
Apply clear contact paper sticky side up, and tape it to the back edges of the board.
Optional: Tape your grid chart underneath the transparent layer as a placement guide.
Step 3: Organize Your Diamonds (Drills)
Separate drills by color and code (use a pillbox, diamond painting tray, or small baggies).
Place a small amount of wax into the tip of your diamond painting pen to make it sticky.
Step 4: Start Painting – One Drill at a Time
Pick up a drill with the pen and press it onto the sticky canvas in the correct square.
Work row by row or color by color for best control.
Cover unused sticky sections with parchment or release paper to avoid dust buildup.
Step 5: Touch Up & Seal Your Art
Once finished, gently press a clean book or roller over your piece to secure the drills.
Apply a clear gloss glaze or Mod Podge to permanently set the diamonds.
Let it dry flat for at least 12 hours.
Step 6: Display Like a Pro
Frame your artwork using a shadow box or mount it directly to a wall.
Consider gifting your finished piece — DIY diamond art makes stunning handmade gifts.


